MAC kids love a project! Projects communicate to them that they will be doing some making, some designing, some problem solving, and probably a good bit of collaborating. They also know that projects are about sustained time to create something they will value…and likely, others will too.
Recently they had a chance to do some paper circuitry–combining art, writing, and science–using a 3 volt battery, copper tape, and a small LED light sticker.
We started with a pre-assessment to document what students already knew about circuits and electricity (not much) and then read a picture book to give them a bit of background knowledge about how electricity and circuits work. We read Switch On, Switch Off by Melvin Berger to give students an overview of electricity and circuits. And while the book is a bit dated, it did pique students’ interest and generated lots and lots of questions. “Breaks” in circuits in conjunction with switches created lots of confusion!
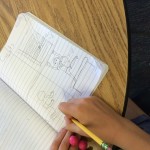
The next day we began talking about how light might affect a piece of writing and art. We showed students examples that we had created and then they began to brainstorm other possibilities…focusing on topics and things they cared about. They were invited to come up with at least four possibilities and began sketching them in their writer’s notebooks.
Just this small selection shows the variety of ideas…and students were eagerly discussing not only what they would draw, but also what they would write. And in typical fashion they were already questioning whether they had to write in the format we had written (we had written a Haiku as an example) or if they could write in some other way. Students used a variety of formats from short poems to longer narratives.
After that, students were asked to commit to a design and draw it on their folded booklet. Then we showed them how to draw a circuit diagram on the inside of their booklet that would allow them to put the light(s) where they wanted them to shine through.
Thursday was the day that the kids got their hands on the copper tape and LED light stickers (finally!). Before they tackled creating their own circuits, we showed them how to work with the materials, how to make turns with the tape, how to use the stickers to measure how far to run their tape…and then they set off to work.
The room hummed with the 43 six through nine-year-olds all focused on getting their circuits constructed with the tape and lights. Many worked with a basic one-light circuit and a few brave students tackled a parallel circuit that included two lights. When the first circuit worked, the entire room lit up with the students’ excited energy.
But as you might imagine, every student was not successful on their first attempt. We suspected we might have to deal with a few tears of frustration during the course of the project…but, although there was frustration, everyone kept at it, and the spirit of collaboration and encouragement could be felt across the room. Some students became expert debuggers–and helped their classmates figure out why their circuit wasn’t working. And we also became experts, giving recommendations and helping those little hands that had trouble keeping their copper tape smooth and getting their battery lined up and clipped on. Even before everyone finished, it was time to clean up…and we reassured them that we would return to the project the next day.
On Friday we were fortunate to have Mrs. Frumovitz (our Science teacher) design a lab to complement our project. She had students work in groups of four to attach components to make a circuit with an AA battery and battery holder, a light holder and a small incandescent light. Because of their experience with the circuits in their project, this was a fun review for them…and they loved that they were able to get their circuits to work!
As part of the lab, they also explored conductors and insulators and noticed which materials allowed the light to light up and which interfered. All of this was useful information as they returned to their circuit/notebooking project to problem solve circuit issues and continue with their art and writing. By the end of the work period on Friday every student had successfully gotten their circuit constructed and their light(s) to work. And we learned some important lessons along the way… The stickers are pretty easy to work with, but grubby little hands can cause interference with the conductivity of the adhesive. We had a few instances where we needed to pull the adhesive off and use tape to secure the sticker. And sometimes our best approach was to peel the copper off and begin again.
Here’s a sneak peek at some of the student projects:
There are still a couple of glitches to work out…some lights are still not making solid contact with the copper tape and either flickering or refusing to light. We will work with students individually to work through these last details. And while students are anxious to take these project home, we have tucked them away until they are unveiled on Open House in a couple of weeks. We are sure they will “light up” the room…literally and figuratively!


